Gene Belcher in Burger Suit | Free Crochet Pattern
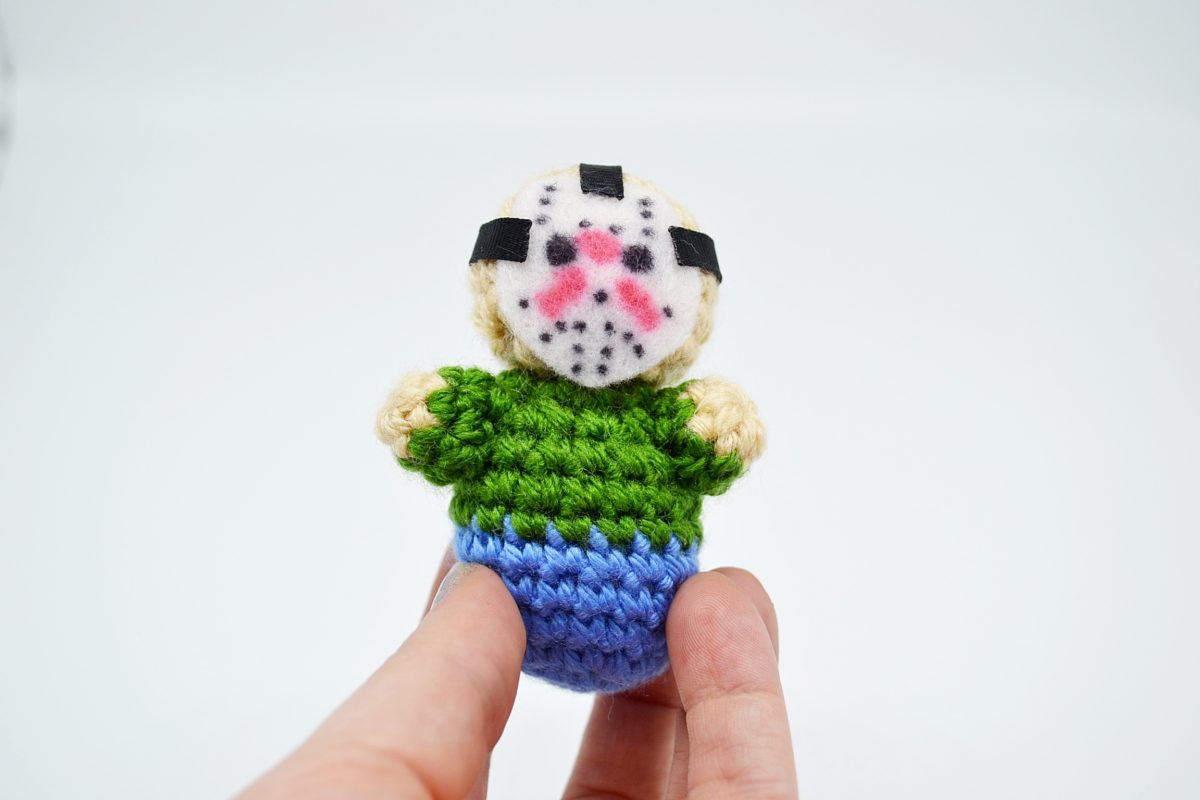
Gene Belcher in his famous burger suit is my very first free crochet pattern in my first Bob’s Burgers crochet series which features the main five members of the Belcher family – Bob, Linda, Gene, Louise and Tina. Links to those patterns will be added as they are completed.
This post features affiliate links, which means if you click a link and make a purchase we may receive a small commission. Thank you for supporting us!

GENE BELCHER IN BURGER SUIT | AMIGURUMI CROCHET PATTERN
SUPPLIES
3.75mm (F) hook
Polyfil
Yarn needle (bent tip works best)
4 medium worsted weight yarn, you will need small amounts of each of the following colors:
- Light blue
- Yellow
- Light beige (skin tone)
- Black
- Brown
- White
GAUGE
4 rows of 4 sc across = 1 inch square
This amigurumi doll is all worked in the round without joining each round. Use the color change method of your choice. The body, head, hair, arms and burger suit are all made separately and sewn together using a yarn needle.
ABBREVIATIONS
st = stitch
sc = single crochet
ch = chain
inc = increase (work two sc in one st)
dec = decrease (2 sc together)
[…] = repeat instructions in brackets the indicated number of times
(…) = number of stitches in that row.
BODY
Light blue yarn.
Rnd 1. sc 6 in magic ring (6)
Rnd 2. inc in next 6 st. (12)
Rnd 3. [sc in next st, inc] 6 times (18)
Rnd 4-6. sc in each st around (18)
Change to yellow yarn.
Rnd 7-8. sc in each st around (18)
Rnd 9. [sc in next st, dec] around. (12)
Rnd 10. [dec] 6 times. (6)
Finish and stuff. Tail will not be used for sewing, so stuff tail inside body or weave in.
Note – if you find it difficult to stuff, pull out round 10 and try stuffing after round 9 and then finish round 10 while body is stuffed.
HEAD
Light beige (skin tone) yarn.
Rnd 1. sc 6 in magic ring (6)
Rnd 2. inc in next 6 st. (12)
Rnd 3. [sc in next st, inc] 6 times (18)
Rnd 4-6. sc in each st around (18)
Rnd 7. [sc in next st, dec] around. (12)
Row 8. [dec] 6 times (6)
Finish and stuff. Leave long tail for sewing.
Note – if you find it difficult to stuff, pull out round 8 and try stuffing after round 7 and then finish round 8 while body is stuffed.
HAIR
Black yarn.
Rnd 1. sc 6 in magic ring (6)
Rnd 2. inc in next 6 st. (12)
Rnd 3. [sc in next st, inc] 6 times (18)
Rnd 4-7. sc in each st around (18)
Finish and leave long tail for sewing.
ARMS
Make 2.
Light beige/skin tone yarn.
Rnd 1. sc 6 in magic ring. (6)
Rnd 2. sc in each st around. (6)
Color change to yellow.
Rnd 3. sc in each st around. (6)
Finish, tie off, and stuff. Leave a long tail for sewing.
BURGER SUIT
Make 2.
Brown yarn.
Rnd. 1. sc 4 in magic ring (4)
Rnd 2. inc in next 4 st (8)
Rnd 3. inc in next 8 st (16)
Rnd. inc [sc in next st, inc] 8 times (24)
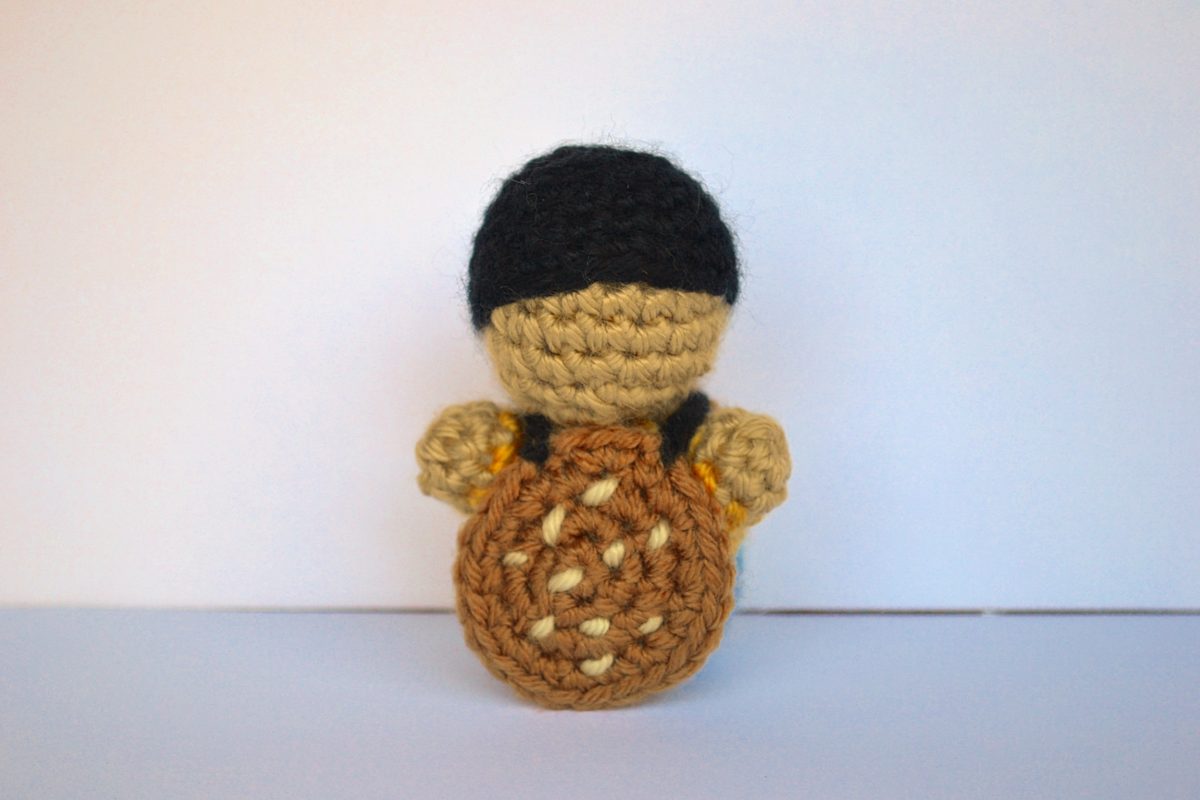
Finish and weave in ends. These are the burger buns of Gene’s burger suit. On one of the buns, stitch ‘seeds’ on the bun with white yarn.

ASSEMBLY
Assemble in this order for best results!*
- Attach head to body.
Using a yarn needle, attach head to body at openings using your preferred method of sewing together amigurumi parts. Each opening will have six stitches and line up evenly. I prefer to use a method where you create a vertical stitch by stitching behind the post from right to left on each stitch.
- Attach hair to head.
Place hair onto head in desired position (like a wig.) Be careful to keep your color changes in the back if they are visible (mine always are.) Using a yarn needle and the long tail from the hair, stitch the hair into place. A yarn needle with a slightly curved tip works great for this. I prefer to stitch on the posts in the last round so my stitches don’t show.
- Attach arms to body.
Position arms as desired on body and sew on using long tail from arm and a yarn needle. If it helps, you can use a stitch marker or small pin to hold the arms in place while you are working. I usually put them around three rows below the top of the body/bottom of the head and a little to the front.
- Burger suit.
Be sure one of the buns is decorated with ‘seeds’ before completing the burger suit. There are two ways to complete the suit – one will make the suit removable, one will make it permanently attached to Gene. In black yarn, tie on the top of one of the buns, then chain four and attach to the top of the other bun. This will be repeated on each side. (If your chains are longer than mine, you may need to only use three.) If you would like the suit to be permanent, place the suit on Gene before you create the second strap and position it close to his neck. If you would like the suit to be removable, complete the suit off of Gene and position the second strap far enough away that it will go over his head. The straps will likely be 3-5 stitches apart.
*If you are new to amigurumi, assembly can be tough! Here are some tutorials from other websites to help you through.
For attaching open pieces (like the head and body)
For attaching closed pieces (like the arms to the body)
PATTERN DISCLAIMER
If you sell products made from this pattern please credit the design to Carly Arnold of Unicorn Hideout, and provide a link to the website www.unicornhideout.com. If you wish to sell your own products made from this pattern, you are not permitted to use, in part or full, any descriptions or photos from this pattern. Photos from unicornhideout.com are not permitted for use on any website, social media or pattern roundup page. If you would like to share a photo and link to this pattern, please email me at unicornhideout@gmail.com for permission. Please do not sell, distribute, duplicate, or share these patterns or downloads in any printed or digital form, or claim patterns as your own original designs.
We would love to see how your lil Gene turns out! Share photos on Instagram with #unicornhideout or share on our Facebook page.
Looking for more DIY projects? Click here.
Need more crochet inspo and FREE patterns? Click here.

Related Post
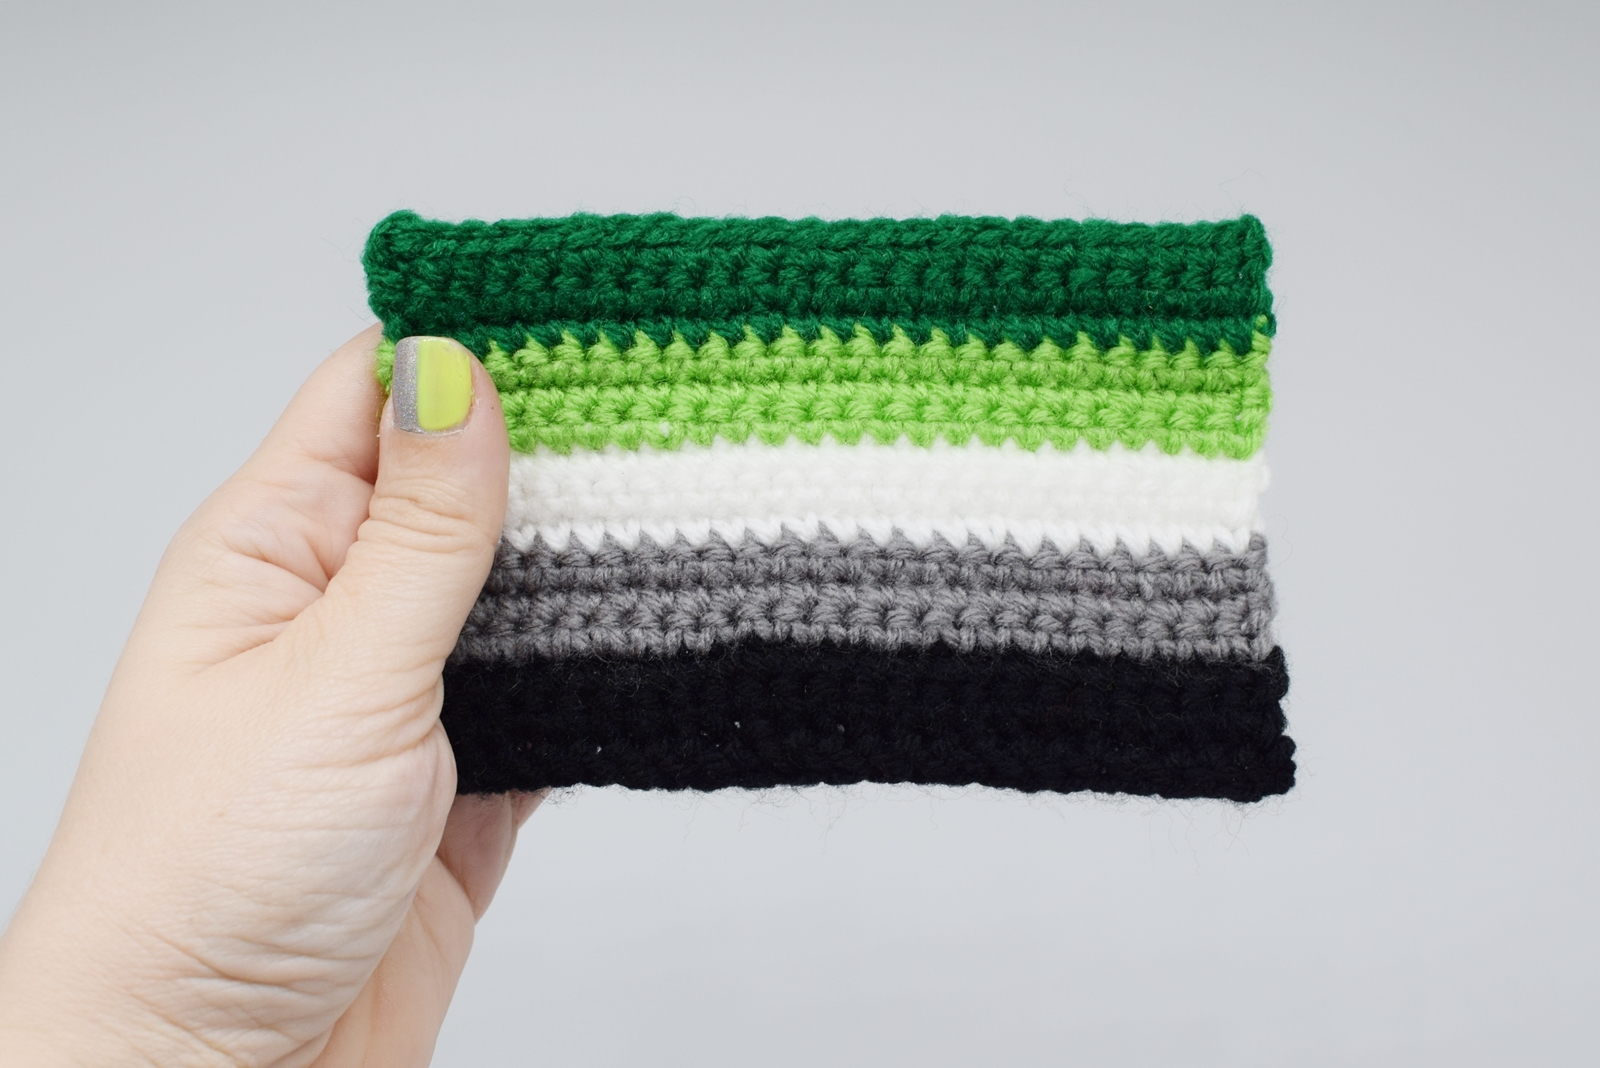
Aromantic Pride Flag | Free Crochet Pattern
Mini Aromantic Pride Flag Free Crochet Pattern This aromantic pride flag pattern is 14 of [...]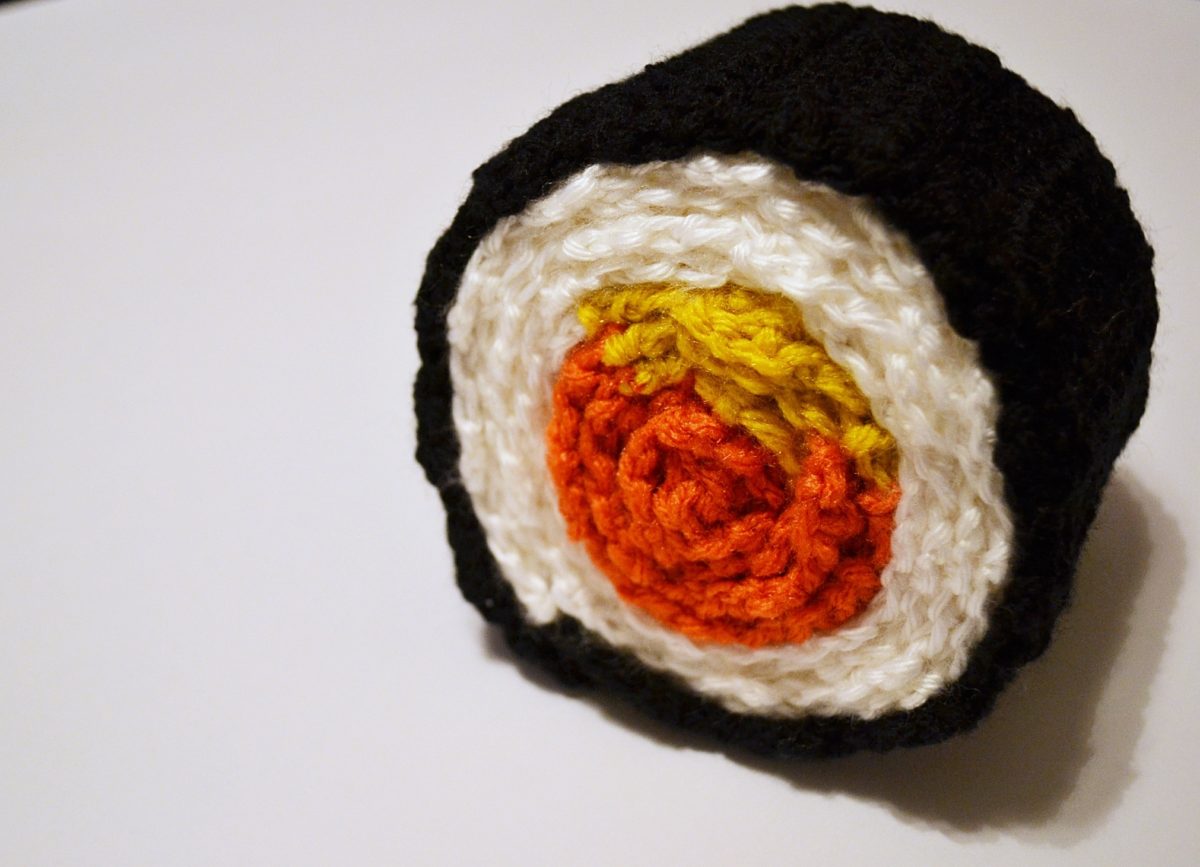
Sushi Scarf Free Crochet Pattern
Sushi Scarf Free Crochet Pattern Scroll below for a sushi scarf free crochet pattern. The [...]